
Epoxy Floor Installation: What to Expect
Knowing how a professional epoxy installation works makes it easier to plan around the project, ask good questions, and compare quotes. Here’s how the process typically unfolds, from bare concrete to finished floor.

The Short Answer
A professional epoxy floor installation generally moves through five stages: evaluating the concrete, preparing the surface, repairing cracks and damage, applying the coating system, and letting it cure. Preparation usually takes the most effort and has the biggest influence on how well the coating bonds. The overall timeline depends on the size and condition of the floor and on the system selected.
The Five Stages of a Professional Installation
A professional installation generally moves through five stages, from evaluating the concrete to letting the coating cure.
01
Evaluate the Concrete
The slab is checked for cracks, old coatings, contamination, and signs of moisture.
02
Prepare the Surface
The concrete is cleaned and mechanically profiled so the coating has something to grip.
03
Repair Cracks and Defects
Cracks, spalls, and pitted areas are filled and leveled before any coating goes down.
04
Apply the Coating System
Primer, body coats, any decorative flake or color, and a topcoat are applied in sequence.
05
Let the Floor Cure
The coating is given time to harden before foot traffic, vehicles, or heavy use.
What Separates a Professional Installation From a DIY Kit?
Most DIY kits rely on a quick acid etch or a simple cleaning, then a thin coat rolled over the surface. That can look good at first, but the coating may not bond well to concrete that hasn’t been properly profiled.
A professional installation typically uses mechanical grinding, commercial-grade materials, and multiple coats built to a specified thickness. Each layer is matched to the one beneath it, and the process accounts for temperature, humidity, and the coating’s working time.
The difference usually shows up months later, in how well the floor holds up to hot tires, dropped tools, and daily traffic.
Why Surface Preparation Comes First
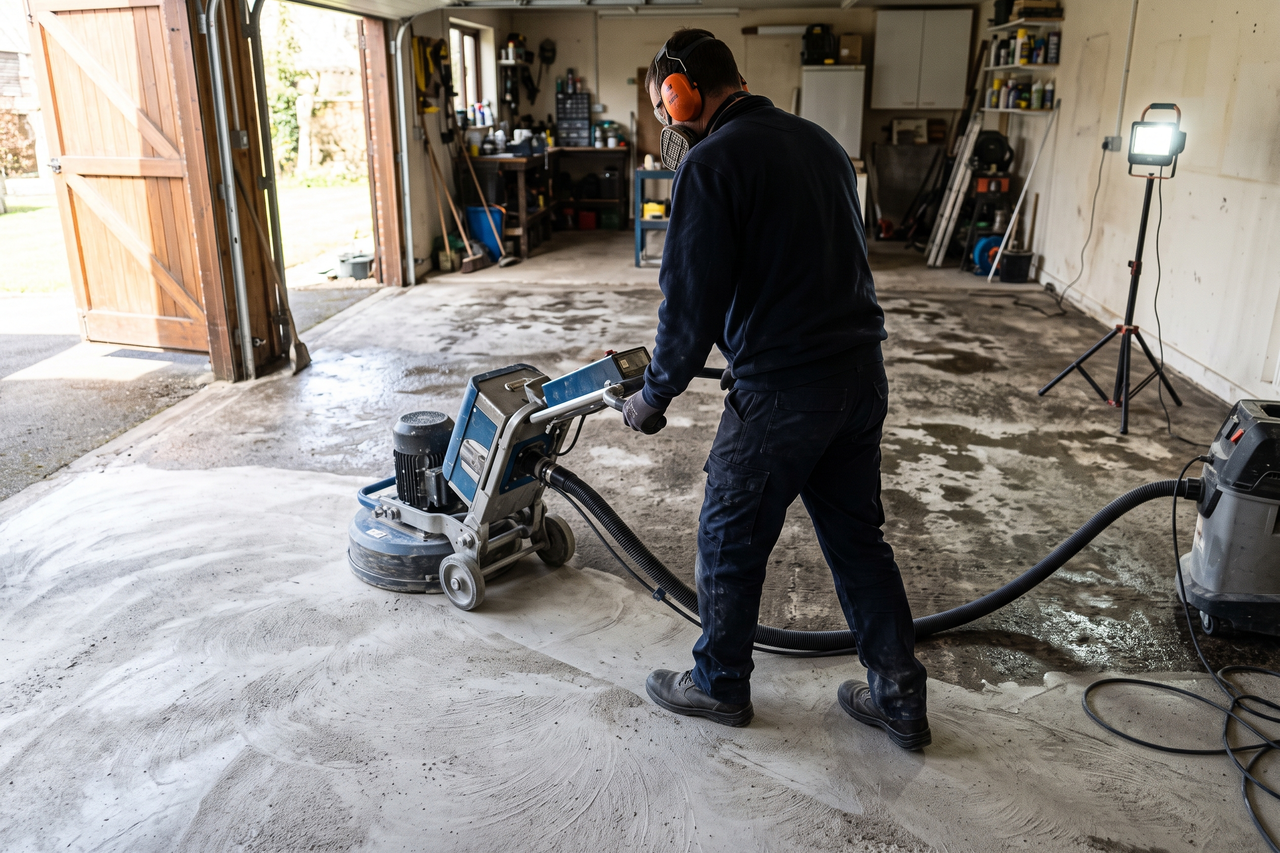
A coating can only perform as well as its bond to the concrete. Dirt, oil, old sealers, and the smooth top layer of a slab all interfere with that bond.
Grinding removes contamination and opens the surface so the primer can penetrate and grip. Moisture evaluation helps identify slabs that need a different primer or system, or that shouldn’t be coated until the issue is addressed.
Preparation isn’t the most visible part of the job, but it’s often part of the difference between a coating that lasts and one that starts to lift. Learn more in our guide to concrete preparation for epoxy flooring.
Repairing Cracks and Surface Damage
Cracks, chips, and spalled areas are repaired after grinding and before coating. Depending on the damage, that may involve epoxy or polyurea crack fillers, patching compounds, or leveling material.
Coating over unrepaired damage tends to leave visible flaws in the finished floor. It can also give a failure a place to start.
Some cracks come from ongoing movement in the slab. Those may show through a coating over time even after repair, so it helps to talk through expectations before work begins.
Applying the Coating System
Most professional systems are built in layers. A primer bonds to the prepared concrete. One or more body coats add thickness and color. Decorative flake or metallic effects go into the build, and a clear topcoat seals the surface and adds wear resistance.
The materials used for each layer depend on the space. Some systems are entirely epoxy, some use a polyaspartic or polyurethane topcoat, and some are fully polyaspartic.
Not sure which approach fits your floor? Compare the options in our guide to epoxy vs. polyaspartic flooring.
How Long Does Epoxy Flooring Take to Cure?
Curing happens in stages. Light foot traffic usually comes first. Vehicles and heavier use come later, and the coating continues to harden and reach full chemical resistance after that.
How long each stage takes depends on the product, the number of coats, and the temperature and humidity during installation. Polyaspartic systems generally return to service faster than many traditional epoxies. Your installer should explain the expected installation and curing schedule before work begins.
System choice affects both timeline and price. See our epoxy floor coating cost guide for how those factors fit together.
Epoxy Floor Installation FAQs
How long does an epoxy floor installation take?
It depends on the floor’s size and condition, how much preparation and repair is needed, and the coating system. Your installer should give you a project and curing schedule before work begins.
Can epoxy be installed on older concrete?
Often, yes. Older slabs need a careful evaluation for cracks, contamination, previous coatings, and moisture. With proper preparation and repair, older concrete can make a good base.
Do temperature and humidity matter during installation?
Yes. Coatings have temperature and humidity ranges for application and curing. Conditions outside those ranges can affect how the coating flows, bonds, and cures.
Will there be an odor during installation?
Some coating products have a noticeable odor while they’re applied and curing. Ventilation helps, and some systems have lower odor than others. Ask about the products being used if odor is a concern.
How should I prepare my space before installation?
Clear the floor completely, including shelving, stored items, and vehicles, and ask what access is needed for power and ventilation. Your installer should tell you exactly what to move before the start date.
Can I install an epoxy floor myself?
DIY kits are available, but they typically skip mechanical grinding and use thinner coatings. Many homeowners choose professional installation for the preparation equipment, materials, and experience it brings.
Planning an Epoxy Floor Installation?
Tell us about your floor and what you’d like it to do, and we’ll connect you with a flooring contractor for a customized quote on epoxy floor installation in Mexico, MO.